Lately I had to upgrade my VPS to meet dependency of a new app. Unfortunately unlike other times, I could not find a guide which would work. After struggling for a while breaking the VPS multiple times and going through few different tutorials here is what worked for me. If you follow the simple steps, you shall be able to properly update your PHP of VestaCP on Ubuntu to 7.1. You will need SSH or any other way to access command line of the machine. I assume you already have VESTA

For the record, I am still using Ubuntu 14.04 LTS, previous version of php was 5.5 and version of Vesta is 0.9.8. However, I think this should work with newer version of ubuntu and php as well. I am using the package nginx+apache, which this tutorial will only work on.
Step 1 — Backup
Yes, starting with the boring backup. There are many things that can possibly go wrong with an upgrade like this. If you don’t want to loose existing applications and configuration don’t forget to take a backup. If it is a VPS, taking a snapshot would do.
Step 2 — Check Current Version
Check what the current version of php you already have by:
php -v
The output shall be something like:
PHP 5.5.9-1ubuntu4.19 (cli) (built: Jul 28 2016 19:31:33)
Copyright (c) 1997-2014 The PHP Group
Zend Engine v2.5.0, Copyright (c) 1998-2014 Zend Technologies
with Zend OPcache v7.0.3, Copyright (c) 1999-2014, by Zend Technologies
Step 3 — Add Third Party Repository
PHP’s new versions are not on the default repository of Ubuntu 14.04. If you are running that, you need to install it from third party repository. For that first you need to install python-software-properties. So, let’s update our package list and install it.
sudo apt-get update
sudo apt-get install python-software-properties
If that was successful, now you can add the third party repository
sudo LC_ALL=C.UTF-8 add-apt-repository ppa:ondrej/php
Let us update the package list one last time as a new repository was added.
sudo apt-get update
Step 4 — Install New Version of PHP
You should now be able to install the new php version.
sudo apt-get install php7.1
During the installation, it may ask to configure database for Roundcube, if you are already using it. If you have already configured it, you can choose not to configure and keep the local existing configuration.

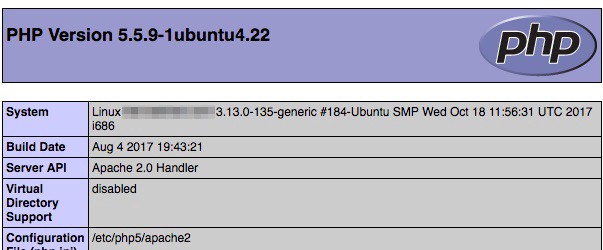
Now let’s create a php file with with the content:
<?php phpinfo(); ?>
And load it up on the server. What does it show if you try to access it?

Step 5 — Telling Apache to Use New PHP
Let’s disable old php version from apache and enable the new one. Use the following commands:
a2dismod php5 # First we disable php5
a2enmod php7.1 # Enable php7.1
sudo service apache2 restart # Restart apache to reload config
Step 6 — Installing Extensions
Though we now have php7.1 enabled and installed, it doesn’t have some common extensions that already were present on vesta. You can use the below command to install some necessary ones that I needed for WordPress and Laravel. You may need few more depending on your needs.
sudo apt-get install php7.1-common libapache2-mod-php7.1 php7.1-cgi php7.1-cli php7.1-phpdbg php7.1-fpm libphp7.1-embed php7.1-dev php7.1-curl php7.1-gd php7.1-imap php7.1-interbase php7.1-intl php7.1-ldap php7.1-mcrypt php7.1-readline php7.1-odbc php7.1-pgsql php7.1-pspell php7.1-recode php7.1-tidy php7.1-xmlrpc php7.1 php7.1-json php-all-dev php7.1-sybase php7.1-sqlite3 php7.1-mysql php7.1-opcache php7.1-bz2 libapache2-mod-php7.1 php7.1-mbstring php7.1-pdo php7.1-dom phpize7.1
If you want to enable php-fpm on apache:
a2enmod proxy_fcgi setenvif
a2enconf php7.1-fpm
Now we will restart apache2 to make the changes to take effect.
sudo service apache2 restart
Conclusion
With that, now you should have a functioning php7.1 installed with your Vesta on Ubuntu. If you think something was missed or want to suggest improvements, feel free to comment below.
Credits
https://kampunghosting.com/2015/12/upgrade-vestacp-to-php-7-ubuntu/
https://www.digitalocean.com/community/questions/php-v-is-7-0-11-and-phpinfo-is-5-5-9?answer=31029


